Before I got the kit I sourced the donor parts. This was a mates abandoned restoration project which I had for £300. It was half dismantled and I got back about half the cost in reselling the bits I didn't want.

Below is the build record tracking the build of my NG TC V8 kit car. The pictures start on the following pages: this page, next page.
When I built this I wanted to actually build and make the parts to complete the car. As the NG company has advanced it is now possible to buy "off the shelf" most of the car and just bolt it together (almost) a bit like the Westfield (a Mechano style kit with predrilled holes and whole assemblies already done for you; built it in a weekend - not really what I wanted). For me I wanted the challenge of working out how to do things, finding my own solutions and hopefully improving the car such that it suited me. With the new SVA it probably saw the end of an era of truly home built cars; good from a safety point of view but disastrous for freedom to express individuality (big brother 1984 takes one step closer).
The NG uses MGB parts, mainly for suspension and drive train or you can buy the bespoke suspension; although for road use the MGB parts are very good and you get more handling for your dosh by buying some decent tyres, which you will have to buy anyway. Its like performance tuning, the law of diminishing returns applies, for engines you start with manifold and air filter, with suspension I think you start with tyres. I think that the fancy suspension would be great for a fast V8 for track use but on the road.... well I think it will get more use from the tyre kicking lads talking in the car park, but thats just cynical old me and my tyres are cheap ones!
If you have the time and inclination you can make lots of the parts to finish the kit and source off the shelf bits from various places - its worth shopping around. Getting people to make you one off items is expensive but if you want something different sometimes you have to be at the mercy of those with the tools and know how. The basic kit itself (when I got mine at least) was competitively priced - the major cost come in the extras especially for the V8. Special exhaust, 3 piece wheels and tyres; well you can kiss goodbye to at least £3k there.
Anyway on with the pictures. There is a commentary next to the pictures but where required there may be a link to a more detailed text diary [here <where? put the link in>].
| |
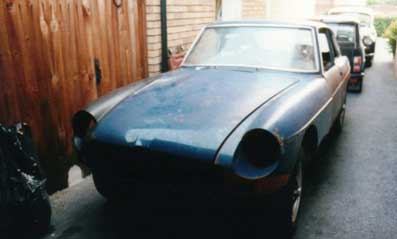
Donor '74 MGB. 1996 Before I got the kit I sourced the donor parts. This was a mates abandoned restoration project which I had for £300. It was half dismantled and I got back about half the cost in reselling the bits I didn't want. |
| |
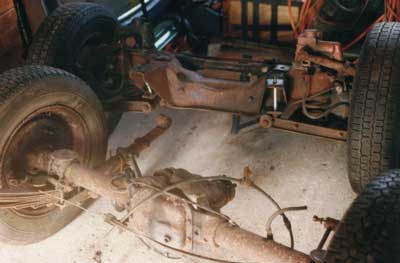
Not much left of the MGB. Mostly the axles. The engine was from a Rover SD1. |
| |
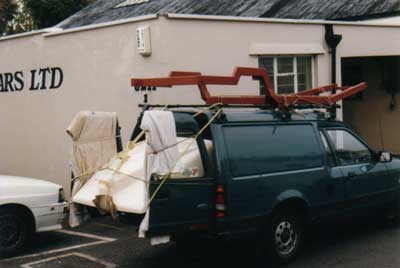
Most of the kit fitted in my Dad's van. Some of the odd bits like bonnet fitted in my Morris. The chassis went into the garage when we got home and I sprayed on two coats of chassis black before the winter set in. I was not too pleased with the primer / metal preparation that the factory had done. I should have stripped it off and done it properly. |
|
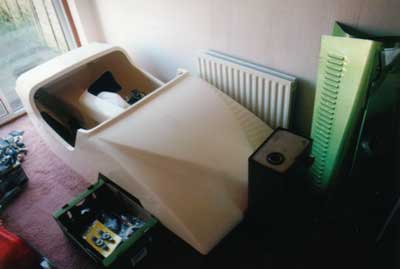
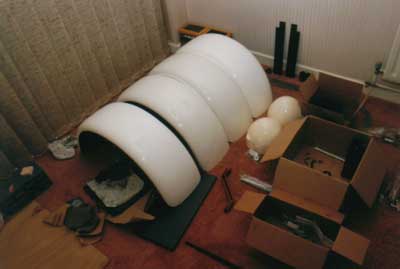
The body tub and some bits. All in my dining room. Well it was winter time and I wanted to get on with it in the warm. Quite a bit of preparation was done inside. Most of the holes were drilled and the layout of everything planned. |
| |
More bits and bobs. They are where the tub was above - over the Christmas break they made a great Christmas tree stand! |
| |
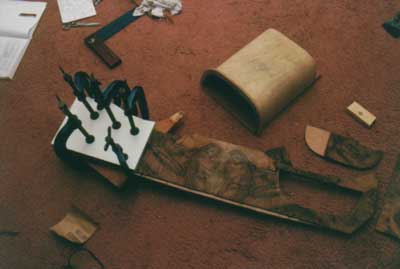
Making the dashboard, it is English walnut (not the cheaper American stuff!). This was not as hard to do as I thought, but finding some suitable varnish was difficult. After a few attempts I settled on using single pack cellulose lacquer. It has (two years on) cracked up the centre join. I think this is caused by movement in the wood and damp. |
| |
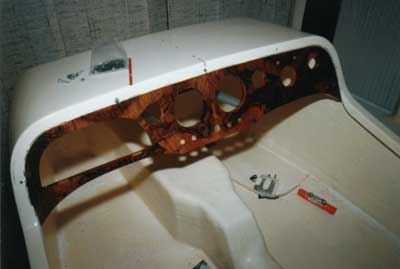
Fitting the dashboard. Although I got it all to fit together, it almost didn't as the body changes shape when bolted down to the chassis. There is a 1/4 inch gap at each end of the dash - luckily it's covered by the trim. |
| |
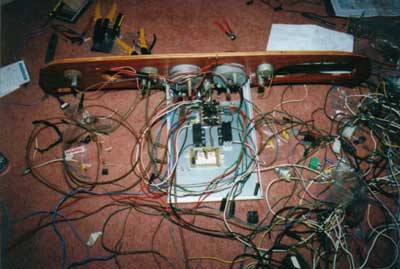
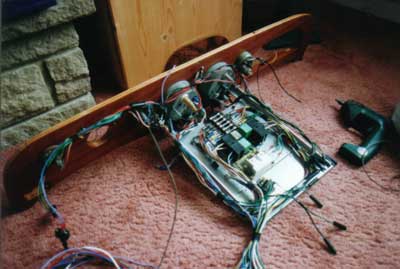
The dash and wiring I also did over the winter. Reusing the MGB wiring loom is not possible (too many bits in different places) so I made my own. The square bit in the middle is the fuse/relay platform; it's hinged for access when in the car (see later pic). It hangs from bracing between the dash and bulkhead. (just visible by the centre gauges). |
| |
Almost done, just needs loom wrapping round the wire bundles. One mistake I made was not leaving enough slack on the wires that go along the back of the dashboard. I hope I don't have to alter any of it. |
| |
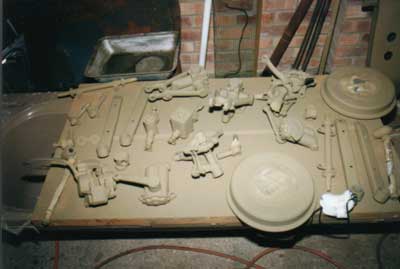
I sand blasted and wire brushed clean all the axle bits. They then got an etch prime and two coats of chassis black. All were sprayed. |
| |
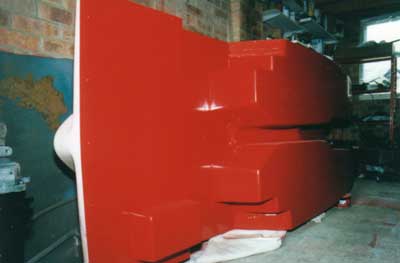
IThe underside of the tub was sprayed ready for fitting to the chassis. I did this before building up the chassis so that the paint had time to set really hard. |
| |
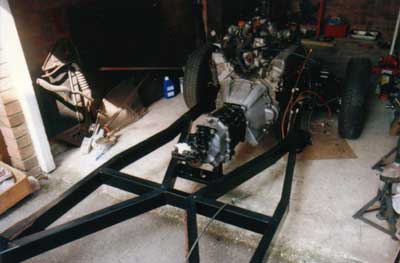
In order to get things lined up the engine is fitted before the tub. Biggest problem here is that the engine mounts on the chassis have a hole each for the rubber mounts and after a days work we decided that it's impossible to fit without expanding the holes into slots. |
| |
Chassis build up. Very rewarding bit this as all those carefully prepared bits finally start to look like something that will roll along. Brake pipes, battery wire, fuel pipe are all added now along the inside edge of the inner chassis rails. Careful measurements so that the pipes will turn up the tub at the right point (see pic below). |
| |
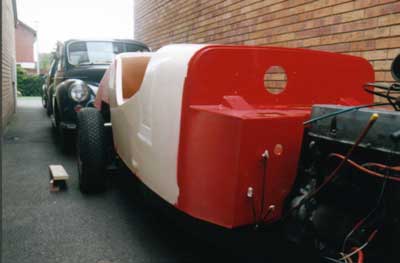
Fitting of the tub. For the V8 setup the gearbox fouls the tunnel so some access holes have to be cut in. No mention of this in the manual but a quick phone to the club experts and its a well known problem. |
| |
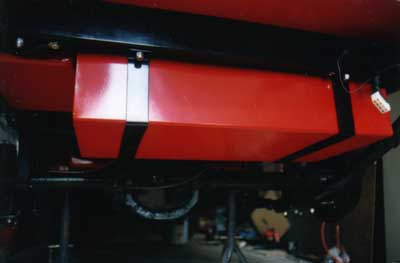
Smart fuel tank - pity it's under the car!! You can't see any of this as the rear valance covers it up. Note the wiring multi-plug to allow easy valance removal. The straps are made a little too deep so the tank needs spacing out from the body and I also bent the straps so they spring against the tank. |
Go on to the next page.